

1
Get the app
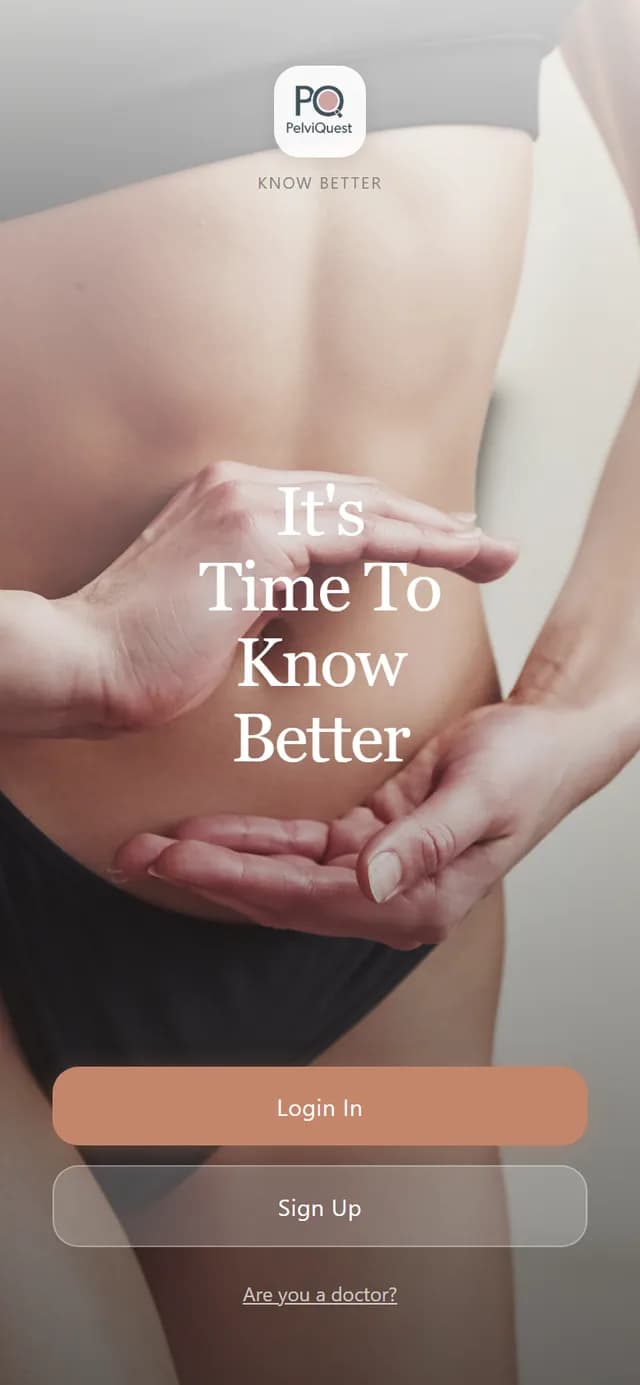
Install PelviQuest from the App Store or Google Play, or open app.pelviquest.com in any browser.
On the first screen, tap Sign Up.
Already have an account? Tap Login In instead and skip to step 4.
Patient guide
Everything from creating your account to your first video visit, in 18 short steps with a screenshot of each screen. Keep this page open on a computer while you set up your phone, or read it on the phone itself.
Screens show sample data. Your doctor code, doctor and clinic will be your own.
Part 1
About ten minutes, once. You will need your email and, if your clinic gave you one, your doctor code.
Install PelviQuest from the App Store or Google Play, or open app.pelviquest.com in any browser.
On the first screen, tap Sign Up.
Already have an account? Tap Login In instead and skip to step 4.
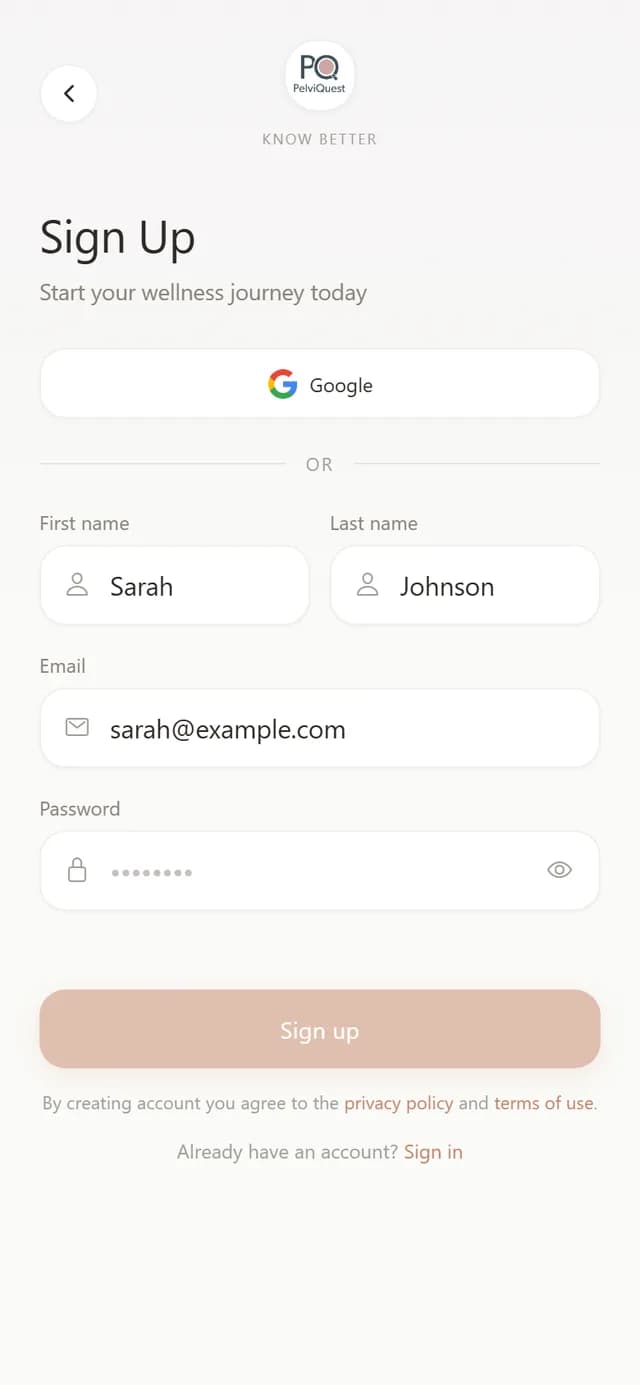
Enter your first name, last name, email and a password, then tap Sign up.
You can also continue with Google and skip the password.
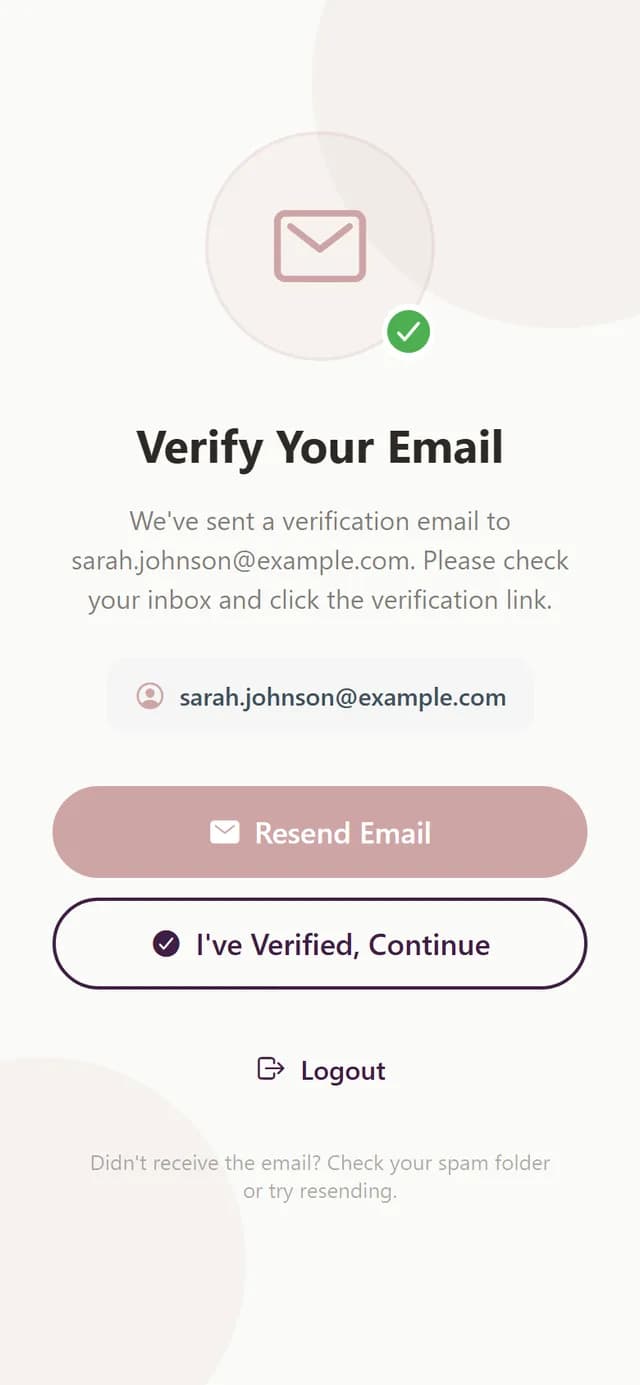
We send a verification link to the address you entered. Open the email and tap the link.
Back in the app, tap "I've Verified, Continue".
No email after a minute? Check your spam folder, then tap Resend Email.
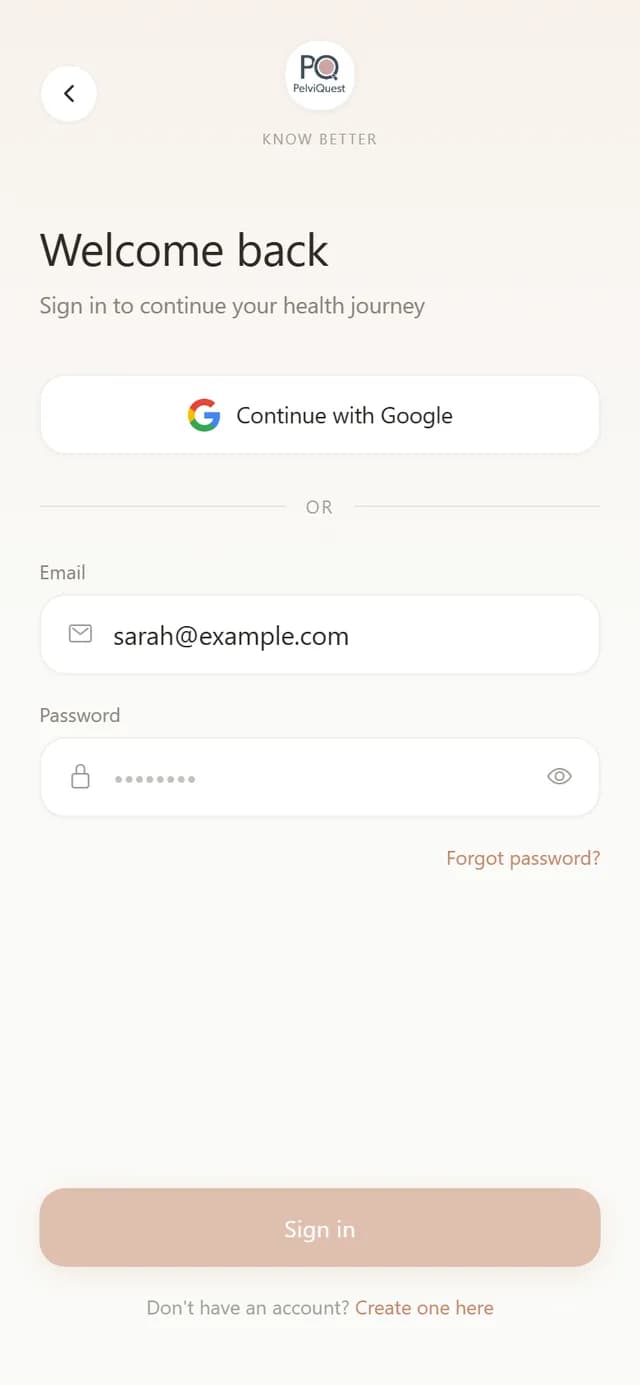
Next time, open the app and tap Login In. Enter your email and password, or continue with Google.
Forgot your password? Tap "Forgot password?" and we will email you a reset link.
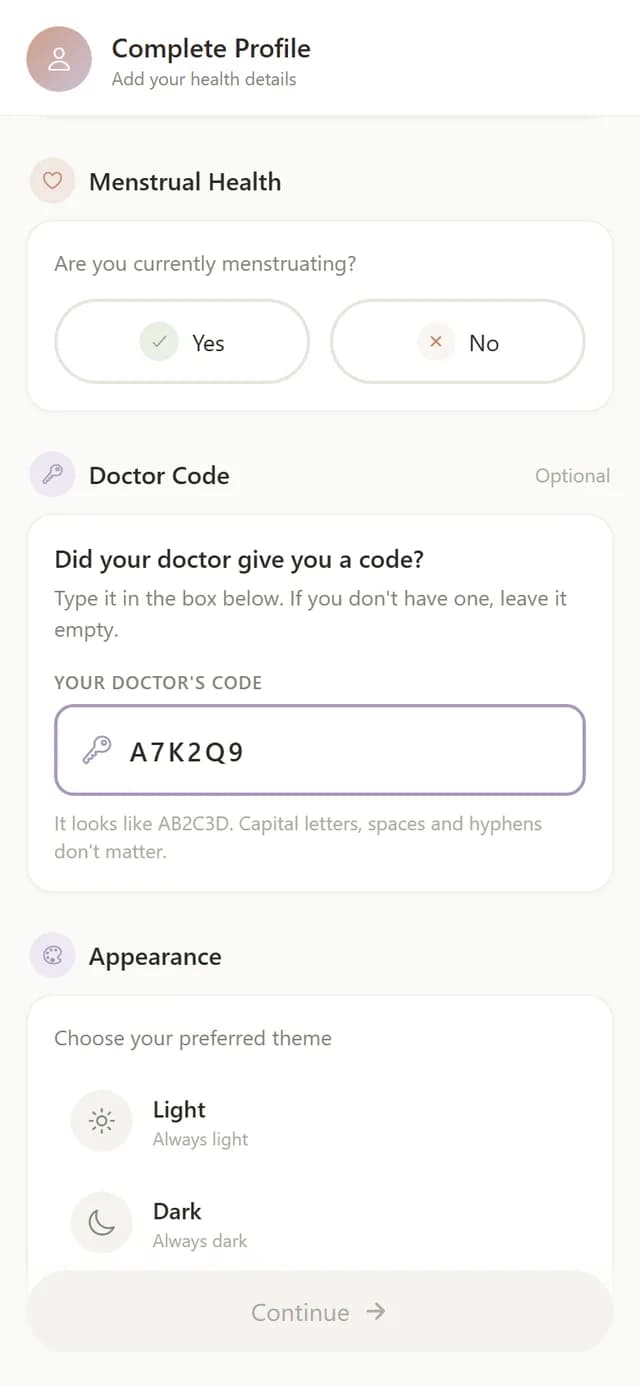
Confirm your name and date of birth, then add your height, weight and whether you currently menstruate. Your doctor uses these to read your results correctly.
If your clinic gave you a doctor code, type it in the Doctor Code box. The code is in your welcome email or on the card the front desk gave you. It links your account to your doctor so they can see your answers.
No code? Leave the box empty and tap Continue. You can connect with a doctor later (next step).
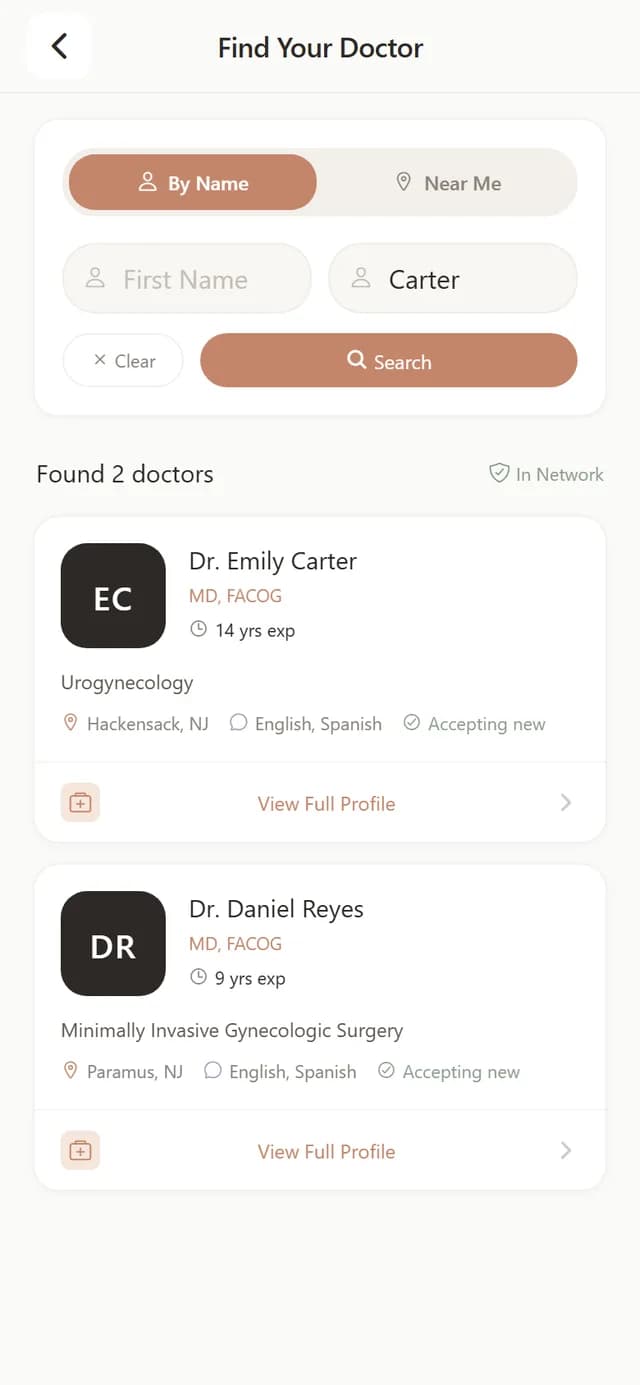
Without a code, you can search our network. From Home, open My Doctor and tap Find a doctor.
Search by name or by ZIP code near you, open the profile you want, and choose that doctor. Doctors appear here after registering with their medical license.
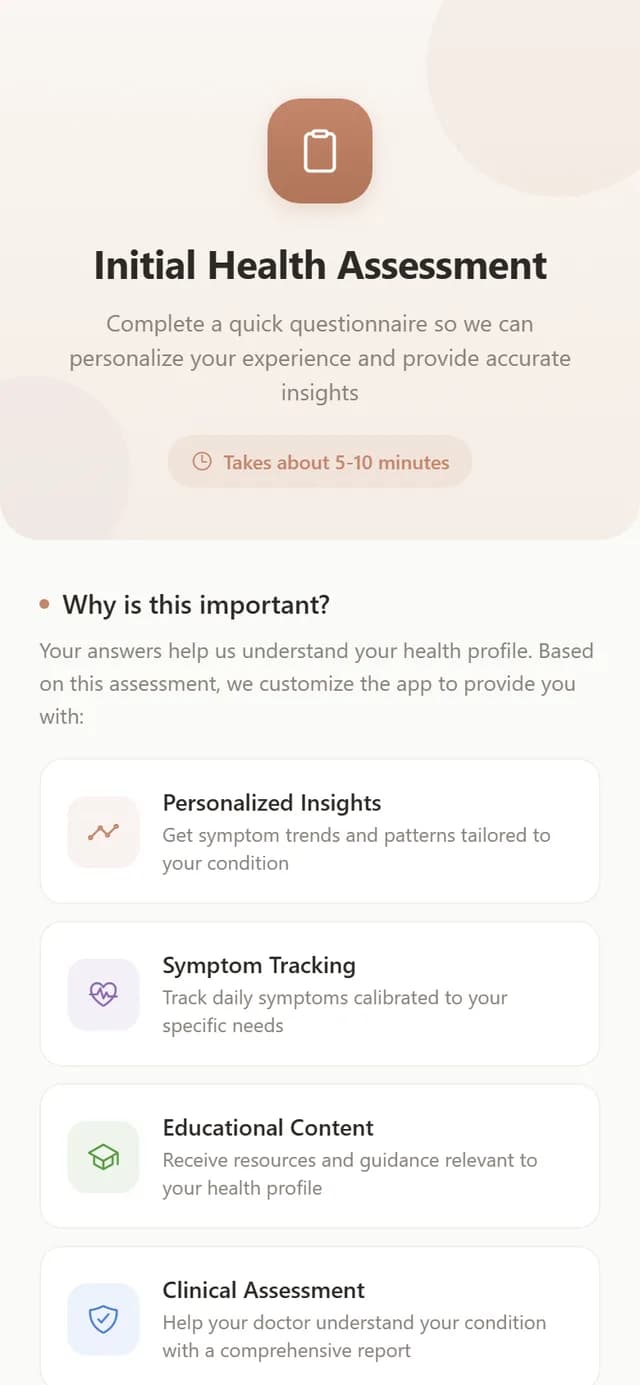
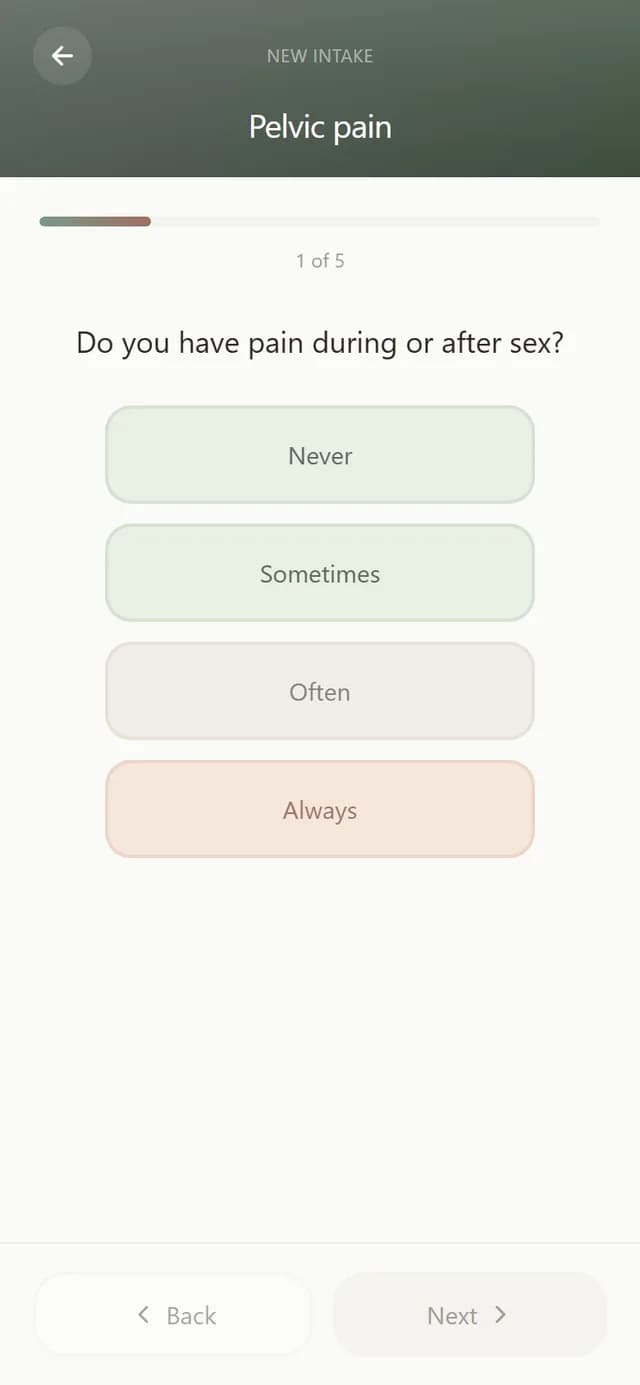
The initial assessment is a questionnaire about your pain, periods, bladder and bowel symptoms and history. It takes 5 to 10 minutes.
One question per screen. Tap an answer, then Next. You can go Back to change anything before you submit.
When you finish, your answers are scored and shared with your doctor. The score is a screening aid, not a diagnosis.
Part 2
Two minutes a day. The more days you log, the clearer the patterns your doctor can see.
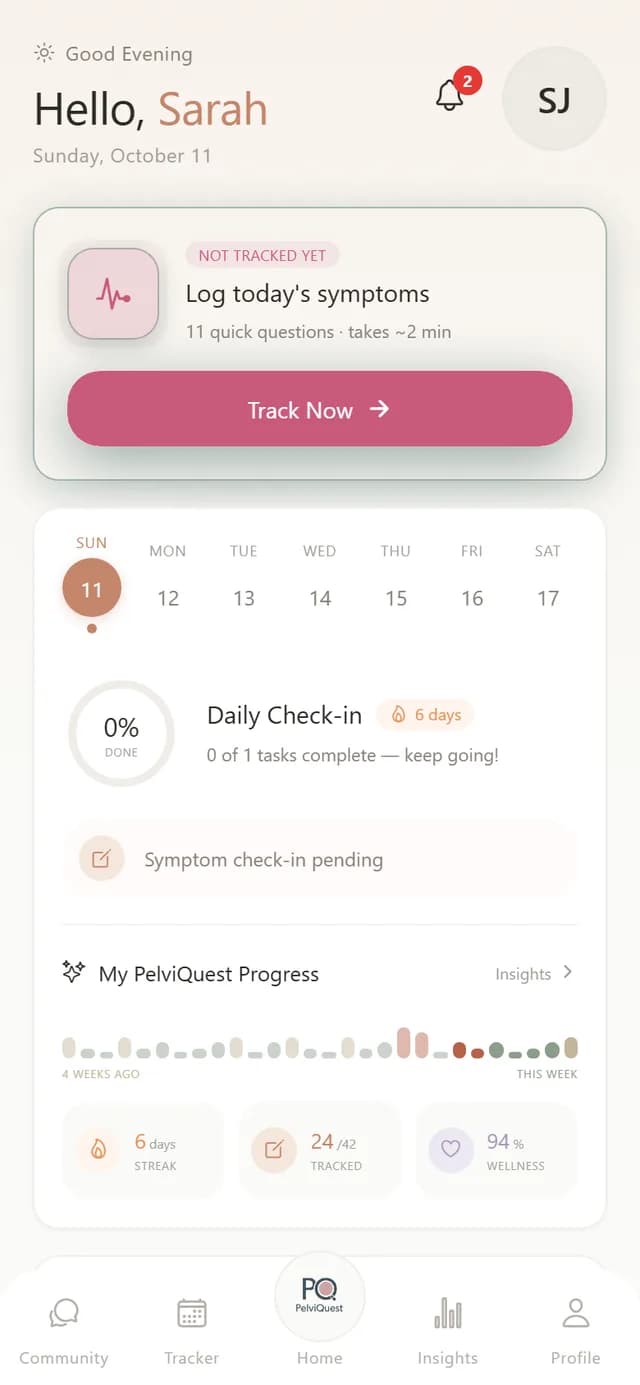
Home shows today's check-in, the week at a glance, your streak and your progress over the last four weeks.
Anything your doctor asks for, such as a follow-up questionnaire or an upcoming visit, also appears here.
The bar at the bottom moves between Tracker, Home, Insights and Profile. The Community tab is a placeholder for a feature that is not live yet.
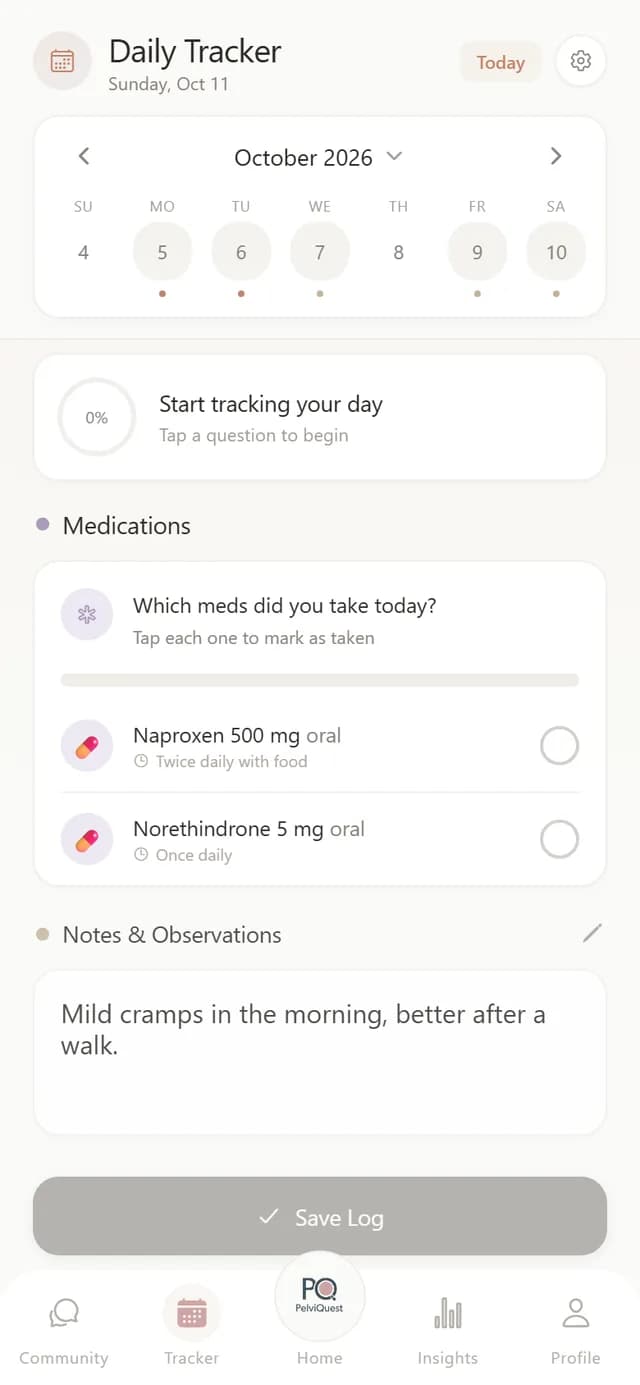
Tap Track Now on Home, or the Tracker tab. Rate your pain and symptoms, note your mood, tick the medications you took and add a note.
Tap Save Log. You can pick an earlier day in the calendar to fill in a day you missed.
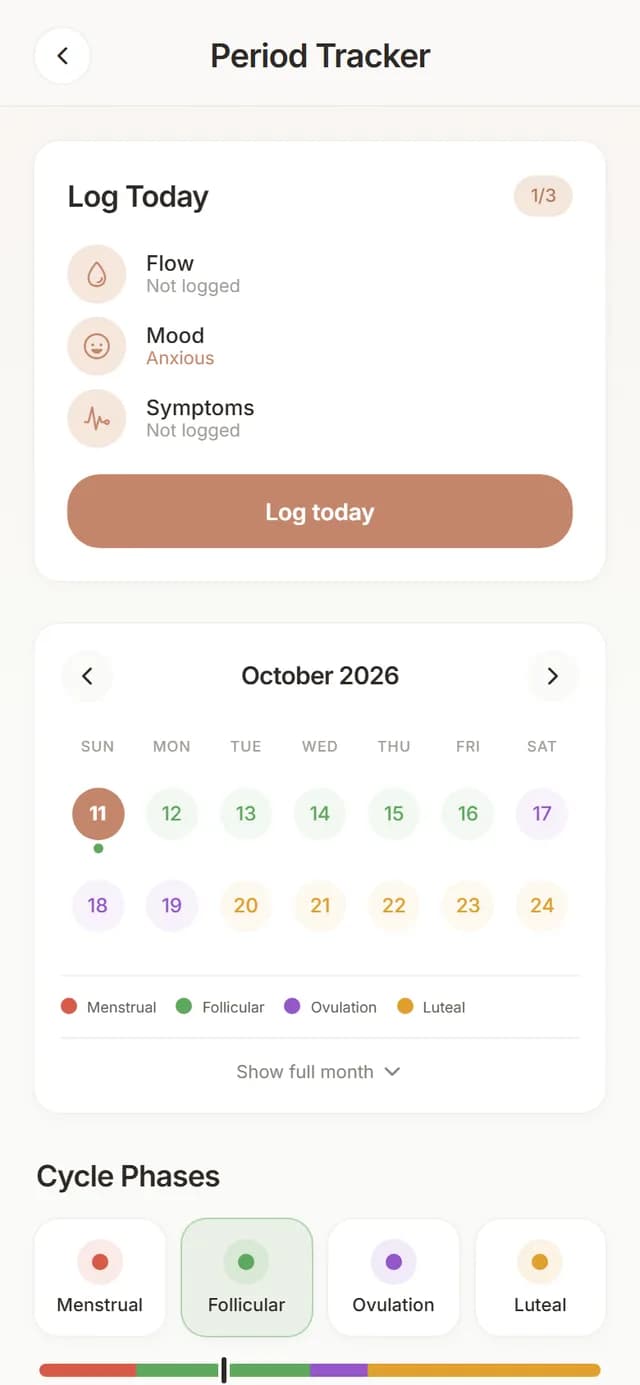
Log your flow, mood and period symptoms each day. After a few cycles the app predicts your next period and shows which phase you are in.
Open it from Home or from the Tracker screen.
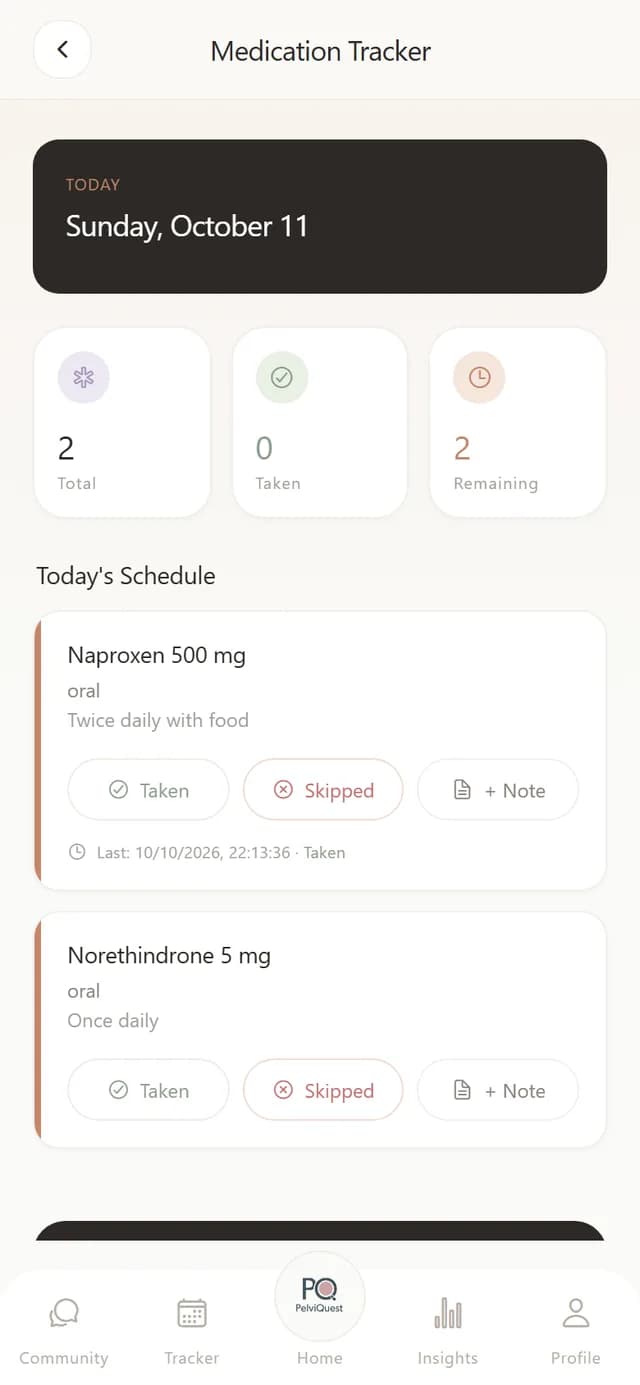
Medications your doctor prescribes appear here automatically, with the dose and instructions.
Each day, mark them Taken or Skipped and add a note about side effects or how well they worked. Your doctor sees this before your next visit.
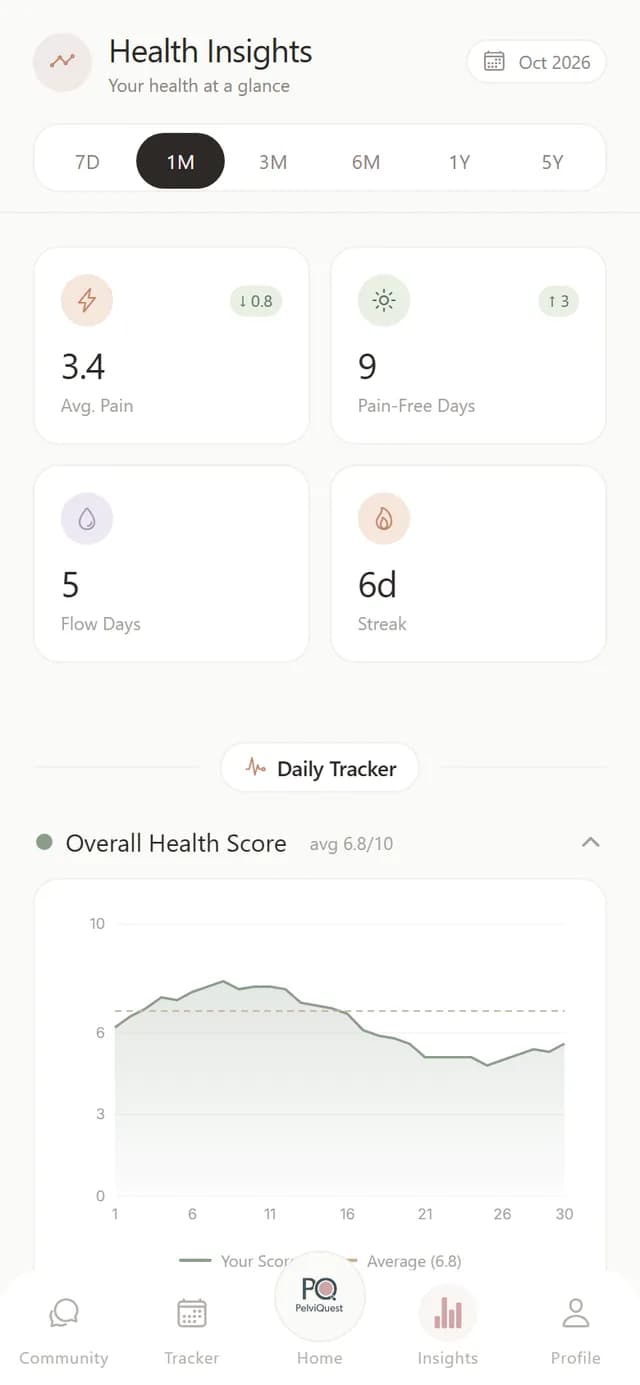
The Insights tab turns your logs into trends: average pain, pain-free days, flow days and your health score over 7 days to 5 years.
Takeaways at the bottom point out what changed, so you have something concrete to discuss with your doctor.
Part 3
Follow-ups, reports, appointments and video visits, all in the same app.
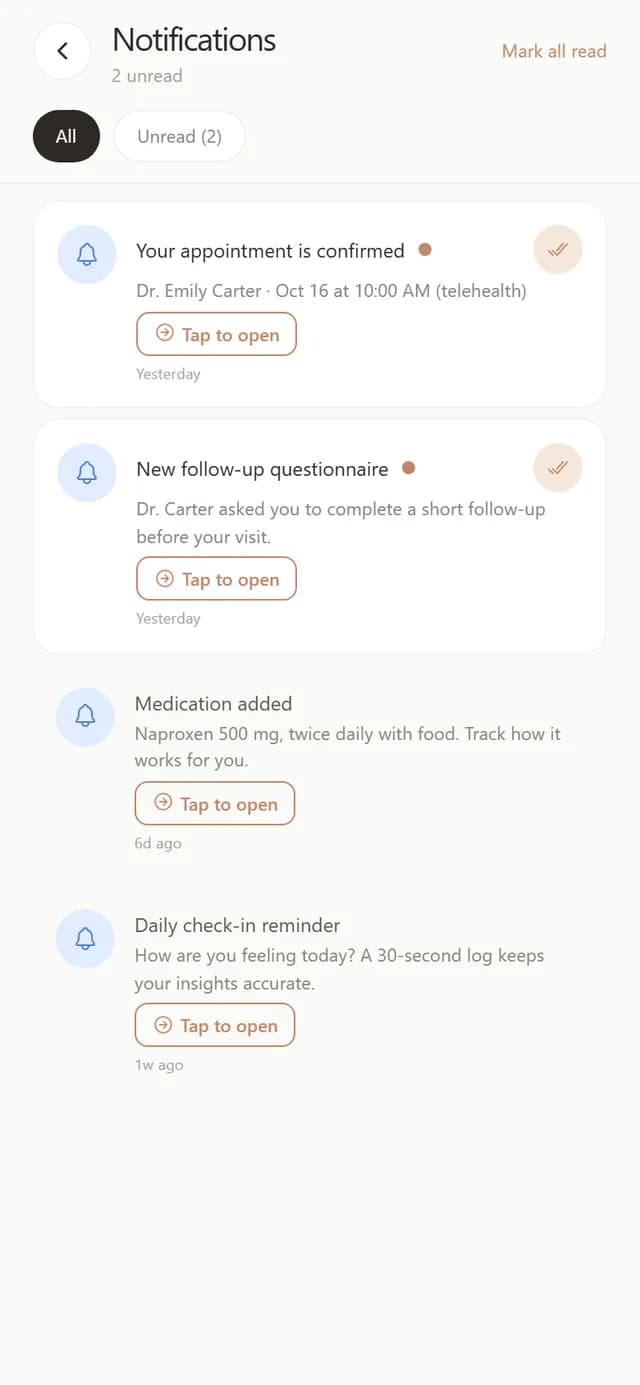
Before a visit, after a procedure, or when your last assessment is older than six months, your doctor can send you a short follow-up.
You get a notification and a card on Home. Answer it the same way as your first assessment.
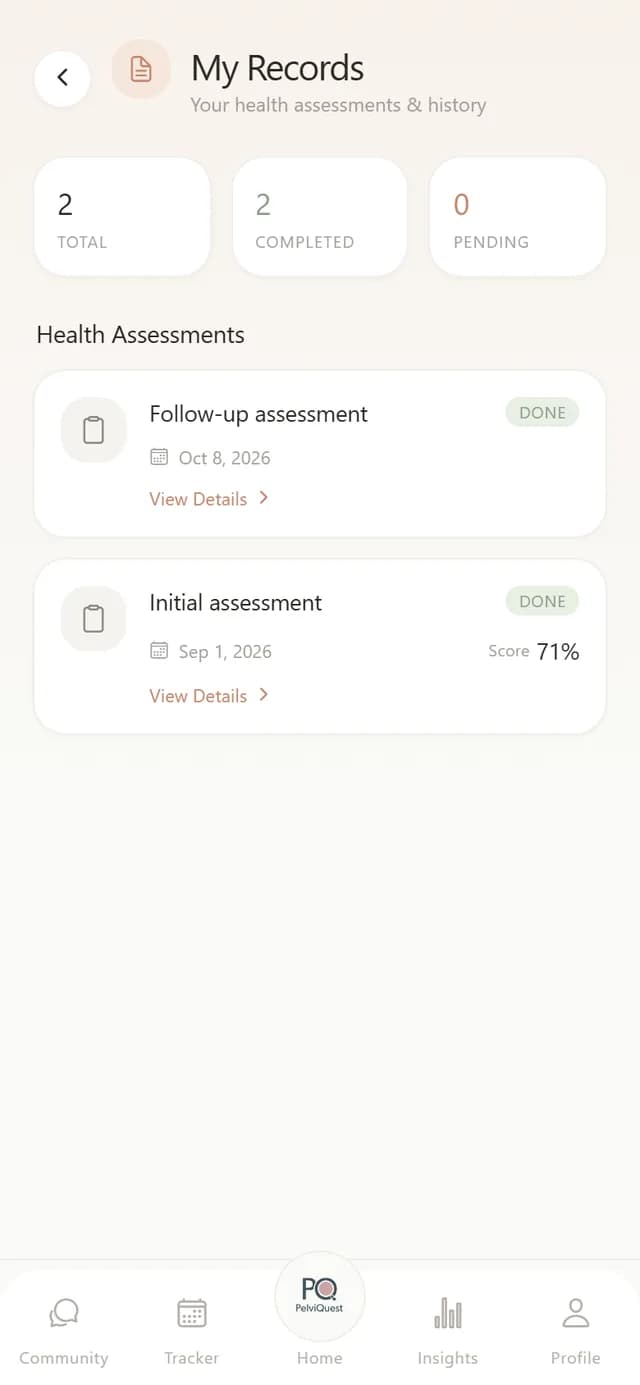
Every assessment you complete is listed with its date and score. Tap View Details to open the full report.
Your doctor already has it. The same report stays in My Records whenever you need it.
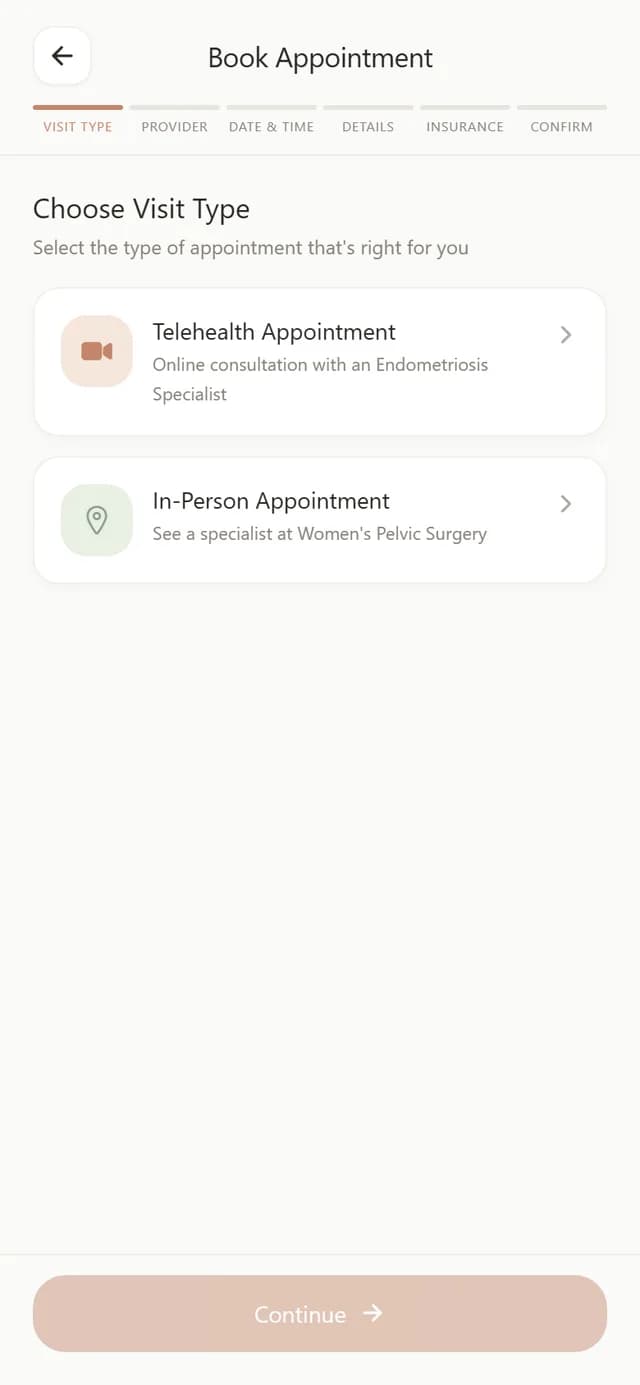
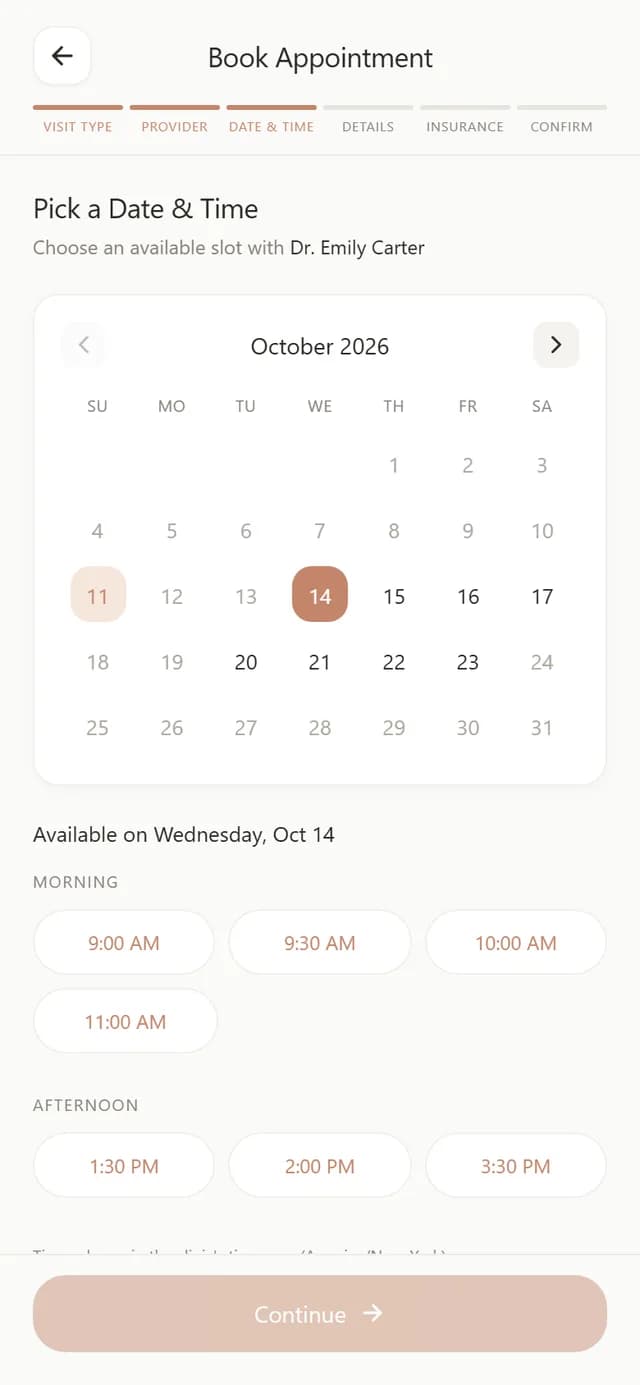
From Home, tap Book New Appointment. Choose telehealth or in person, your doctor and office, then a date and time.
Add a reason and a phone number, review, and tap Confirm. Your booking is a request until the clinic confirms it; you get an email and a notification when they do.
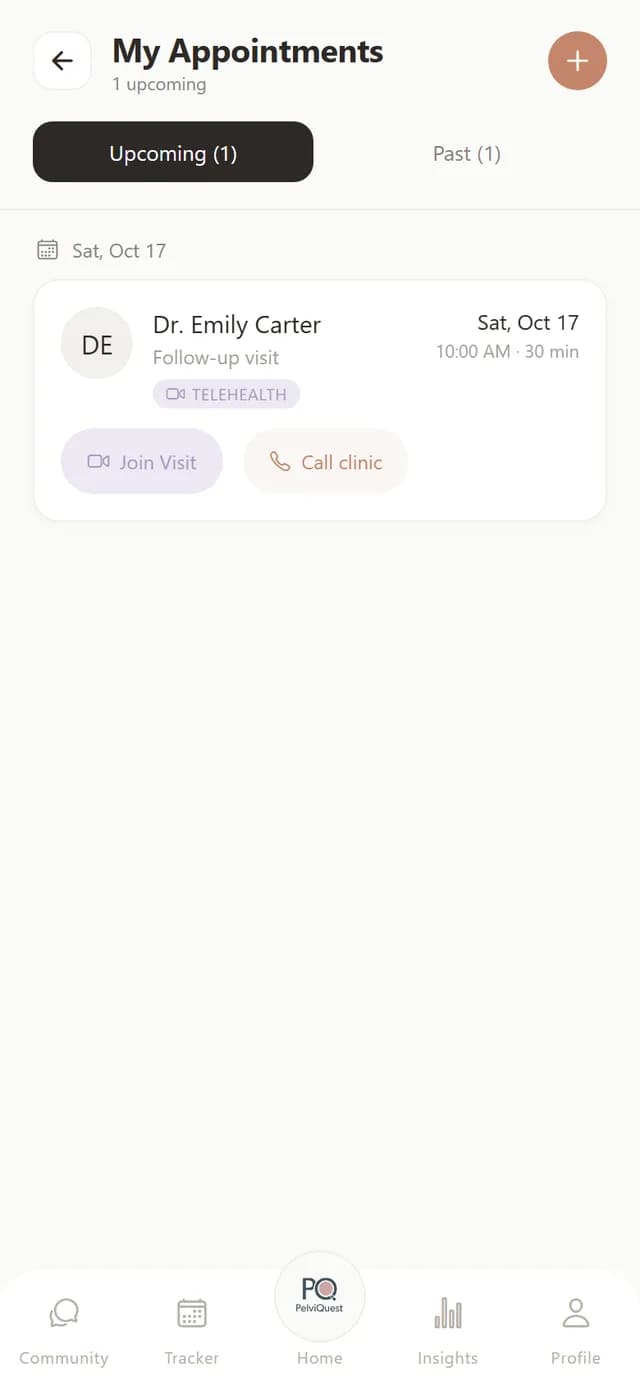
My Appointments lists what is coming up and what is past.
For a telehealth visit, tap Join Visit at the appointment time. The video call opens inside the app. Need to change the time? Tap Call clinic.
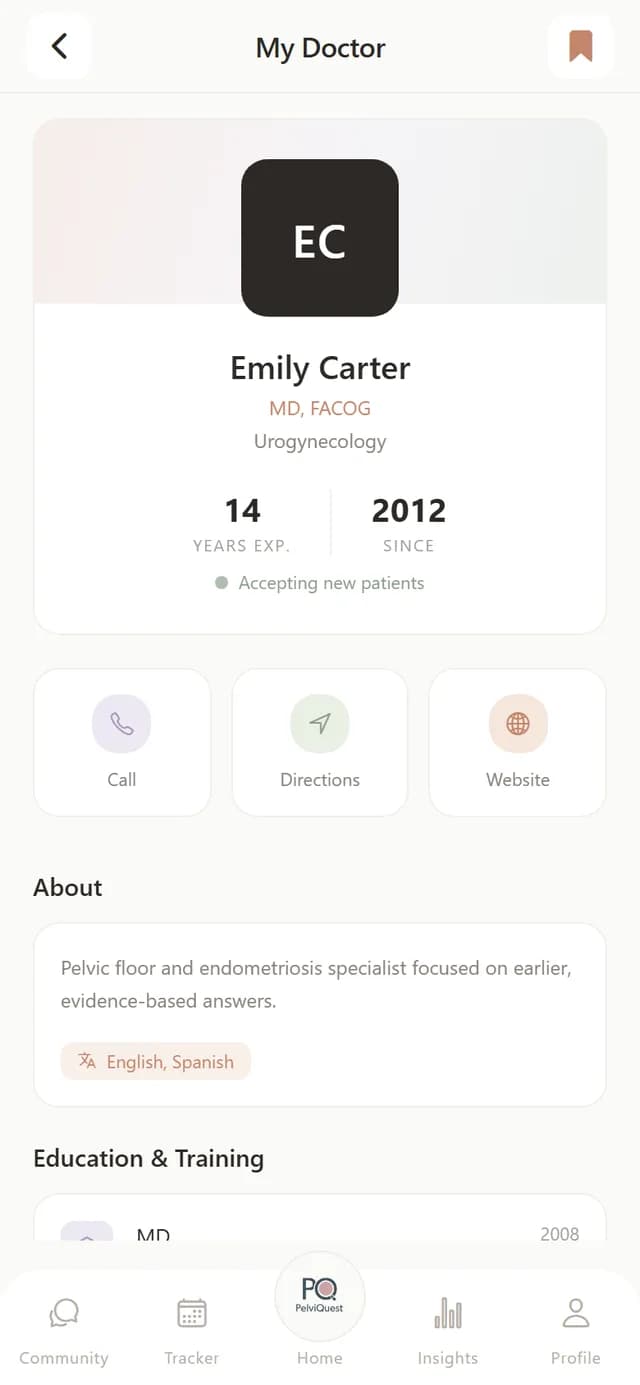
Your doctor's profile, with one-tap Call, Directions and Website.
Open it from the My Doctor card on Home.
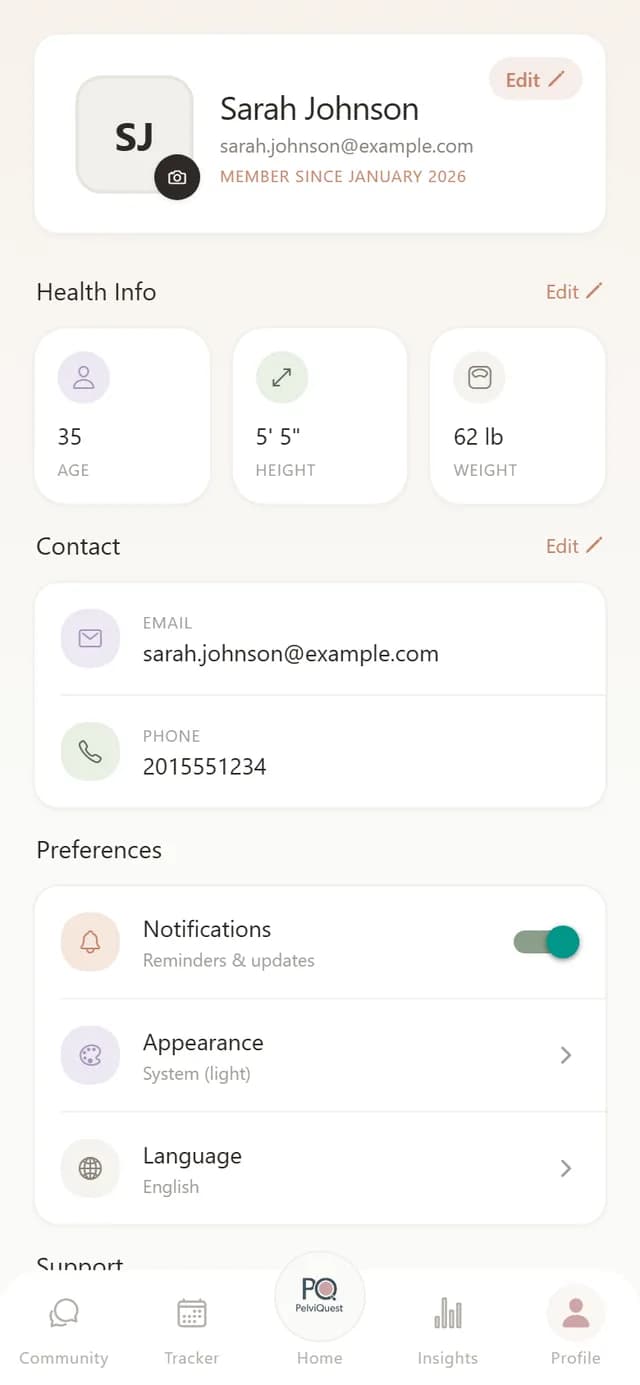
Update your health info and contact details, switch notifications on or off, and choose light or dark appearance.
You can delete your account from here at any time.
Ready to start?
Get the PelviQuest app
Free to start. The same account works on iPhone, Android and in your browser, so you can sign up on one and continue on another.
Stuck on a step?
Email us at hello@pelviquest.net or ask your clinic's front desk. For a code that does not work, check it with your clinic; capital letters, spaces and hyphens do not matter.